Latest Posts :
Recent Posts
Showing posts with label Computers and Electronics. Show all posts

வைரஸ் தாக்கிய‘ பென்ட்ரைவ்’ இலிருந்து பைல்களை மீட்க சிம்பிள் வழி!


usbதற்பொழுது தகவல்களை சேமிக்க பெரும்பாலானவர்களால் பயன்படுத்தப்படுவது USB பென்டிரைவ்கள்.  இதில் முக்கியமான பிரச்சினை வைரஸ் பிரச்சினை வெவ்வேறான கணினிகளில் உபயோகிப்பதால் வைரஸ்கள் சுலபமாக பென்டிரைவில் புகுந்து உள்ளே இருக்கும் பைல்களை பாதிக்கிறது.  இப்படி பாதிக்கும் பொழுது உங்கள் பென்ட்ரைவில் உள்ள பைல்கள் மறைக்கப்பட்டுவிடும் கணினியில் பென்டிரைவை ஓப்பன் செய்தால் எந்த பைல்களும் இருக்காது.  வெற்றிடமாக இருக்கும்.  ஆனால் properties சென்று பார்த்தால் பைல்கள் இருப்பது போன்றே அளவு காட்டும்.  காரணம் நம் தகவல்களை வைரஸ்கள் மறைத்து வைத்துவிட்டது.  பென்டிரைவில் முக்கியமான தகவல்கள் ஏதும் இல்லை எனில்format செய்து பென்டிரைவை திரும்ப பெறலாம்.  ஆனால் ஏதேனும் முக்கியமான தகவல்கள் இருந்தால் எப்படி அந்த பைல்களை பத்திரமாக மீண்டும் கொண்டு வருவது என பார்ப்போம்.

இதற்கு நீங்கள் எந்த மென்பொருளையும் உங்கள் கணினியில் Install செய்து உபயோகிக்க வேண்டியதில்லை.  உங்கள் கணினியிலேயே சுலபமாக  செய்து விடலாம்.  கீழே உள்ள வழிமுறையின் படி கவனமாக செய்து அந்த பைல்களை மீட்டு எடுங்கள்.

1. முதலில் பென்டிரைவை உங்கள் கணினியில் சொருகி கொள்ளுங்கள்.

2Start==Run ==CMD ==Enter கொடுக்கவும்

3. இப்பொழுது பென்ட்ரைவ் எந்த ட்ரைவில் உள்ளது என பாருங்கள்.  My computer செல்வதன் மூலம் கண்டறியலாம்.

4. உதாரணமாக E டிரைவில் பென்ட்ரைவ் இருக்கிறது என வைத்துக் கொள்வோம் அதற்கு நீங்கள் சி என கொடுத்து Enter அழுத்தவும்.

5. attrib -h -s -r /s /d * . * என டைப் செய்யுங்கள் ஒவ்வொரு பகுதிக்கும் Spaceசரியாக கொடுக்கவும்.

நீங்கள் சரியாக கொடுத்து உள்ளீர்கள் என உறுதி செய்து கொண்டு Enter அழுத்துங்கள்.

சில வினாடிகள் பொறுத்திருங்கள்.  இப்பொழுது உங்கள் பென்ட்ரைவ் சோதித்து பாருங்கள் உங்களுடைய பைல்கள் அனைத்தும் திரும்பவும் வந்திருக்கும்.

What is the safest free email service available to the public?


According to me it is GMAIL .

First it will never ever go down as powered by the king of web, Google
Second hacking Gmail is Infact impossible, many hackers seriously try forgot password but in Gmail if you dont have mobile or alternate email you have to verify your self by CREDIT Card. 

Govt Agency also can not view these email as they are encrypted over 128 bit or 256 bit encryption

One Incident:
Once there was a virus which was decrypting HTTPS protocol messages , google was the first one to recover over this issue.

But one thing is there about gmail is that algorithms of GMAIL read your email for showing up advertisement (Outlook do not read your email)

What's the difference between Core i3, i5 and i7 processors?

Confused about which Intel processor you need? We explore the differences between the Core i3, i5 and i7 range


Intel Core i7-4790K illustration
Although Intel's naming convention is generally a lot better and less confusing than it used to be, it can be difficult to work out exactly which processor suits your needs. If you're struggling to work out the differences between the Core i3, i5 and i7, don't worry, as we'll explain everything for you.

Architecture

First, it's important to explain about architecture and codenames. Every year, Intel releases a newer, faster range of processors. We're currently starting to see Devil's Canyon chips, a refresh of last year's Haswell. Before that we had Ivy Bridge and Sandy Bridge. Generally speaking a Core i3, i5 or i7 that has a newer architecture is faster than the older-architecture processor that it replaces. You can tell the architecture by the model number, Devil's Canyon and Haswell start with 4; Ivy Bridge with a 3; and Sandy Bridge with a 2.
The most important thing about different architectures is making sure that you have a motherboard that supports the type of processor you're interested in. Processors, regardless of whether they're a Core i3, i5 and i7, based on the same architecture are fundamentally the same inside. The differences in performance come from which features are enabled or disabled, the clock speed and how many cores each one has.
ModelCore i3Core i5Core i7
Number of cores244
Hyper-threadingYesNoYes
Turbo boostNoYesYes
K modelNoYesYes
The feature table above shows you how the most popular processors line-up in terms of features. The differences in Core i3, i5 and i7 are the same for Sandy Bridge Ivy Bridge, Haswell and Devil's Canyon (a Haswell refresh). Note that there are exceptions (see below), but you're mostly unlikely to encounter these odd models when buying a new CPU. Also, mobile processors are completely different again, so we're focussing on desktop models here only. What's important is what these different features mean, which we'll explain.

Cores

A core can be thought of as in individual processor. A dual-core processor, therefore has two internal processors, a quad-core model has four. More cores are useful for multi-tasking; for example, you can run two applications at the same time, each one having access to its own dedicated processor.
More cores are also useful for multi-threaded applications, such as video editing. With these types of applications they can use multiple cores to improve performance. Single-threaded applications can only use a single core leaving any others idle. Core i3 processors have two cores, Core i5 CPUs have four and Core i7 models also have four.  Some Core i7 Extreme processors have six or eight cores. Generally speaking, we find that most applications can't take full advantage of six or eight cores, so the performance boost from extra cores isn't as great.

Hyper-Threading

Hyper-Threading is Intel's technology for creating two logical cores in each physical core. In other words, to your operating system it appears as though your CPU has double the number of cores than it really does.
In terms of performance, Hyper-Threading speeds up multi-tasking and multi-threaded applications. It's not as fast or as efficient as extra 'real' cores, but it's an improvement over a single Core. Core i3 and i7 processors have this technology, Core i5 processors do not.

Clock Speed

The faster the clock speed in MHz, the faster each core can run. This can create some variances in performance. For example, a Core i3-4370 Haswell processor runs at 3.8GHz. It would be faster running a single-threaded application, which can only use one core, than a Core i5-4590, which only has a clock speed of 3.2GHz. However, running a multi-threaded application, the Core i5 would most likely be quicker, as its four real cores are better than the Core i3's two cores and Hyper-Threading.

Turbo Boost

Turbo Boost is Intel's technology for automatically overclocking a processor, boosting its clock speed higher than the default setting. The CPU monitors its temperature and, when it's running cool enough, will apply the overclock. Core i5 and i7 CPUs have this technology, Core i3 models do not.

K Models

Any CPU that has a model ending with a K means that it the CPU is unlocked. This means that you can use BIOS settings to up the clock speed of the chip, overclocking it yourself. We've seen big improvements in performance this way - we pushed the Intel Core i7-4790K chip to 4.7GHz!

Graphics chip

All Intel processors have graphics chips in them. Pre-Haswell, the GPUs weren't particularly good for games, although they were fine for watching video. With Haswell, came the Intel HD Graphics 4600 line, which is fine for a bit of light gaming; some cheaper models (we'll show you how to check later) have HD Graphics 4400 chips, which are fine for some older less-demanding games. Some of the more expensive chips have Intel Iris Pro chips in them. They're slightly faster in games, but can cope with 4K video, making them suitable for high-end video editing
In all cases, if you're serious about playing games, Intel chips don't cut it and won't give you high-resolution, high-detail gaming. We recommend buying a dedicated graphics card instead.

Exceptions

As always, there are some exceptions to the rules. In particular, Intel sells some low-power processors, where the model name ends in a T, TE or S. For example, the Core i5-4570T has two cores and Hyper-Threading. Fortunately, these models aren't generally available and we recommend avoiding any of these strange models unless you have a specific reason for wanting one.

How to check features

If you're not sure which features that processor you're interested in has, you can use theark.intel.com website. Just use the search box to search for a model number and you'll find all of the features your processor has.

Which one should I buy?

As a rough guide, a Core i3 chip is fine for day-to-day use. Go for a Core i5 if you do a lot of video or photo editing. A Core i7 chip is generally more expensive than it's worth, in our experience, but buy one if you do a lot of video editing, particularly 4K, or other processor-intensive tasks. Our current best buys are the Devil's Canyon Core i7-4790K and the Haswell Core i5-4670K.

How to Install Windows 8

Windows 8 is Microsoft's latest operating system which is completely redesigned. It moves away from the traditional interface to a completely new interface known as Metro User Interface. The familiarstart menu is now gone. Icons and windows are replaced with live tiles and magazine styled interface. Unlike any previous versions, Windows 8 and its variation RT works across multiple architectures and has been optimized for touch screen. So it will work on Intel based PCs or an ARM based tablet.

This step-by-step guide demonstrates how to install Microsoft Windows 8 Professional. You can follow this guide if you have Windows 8 basic edition or any other version asthe steps are very similar.

The best way to install Windows 8 is to do a clean install. Before you start the installation process I recommend that you check Windows 8 System Requirements to ensure that your hardware is supported by Windows 8. If you don't have Windows 8 drivers for all your hardware, it is a good idea to download all the drivers from the hardware manufacturers web site and save all the necessary drivers on a CD/DVD or a USB drive before you start the installation.

Windows 8 Professional DVD is bootable. In order to boot from the DVD you need to set the boot sequence. Look for the boot sequence under your BIOS setup and make sure that the first boot device is set to CD-ROM/DVD-ROM.

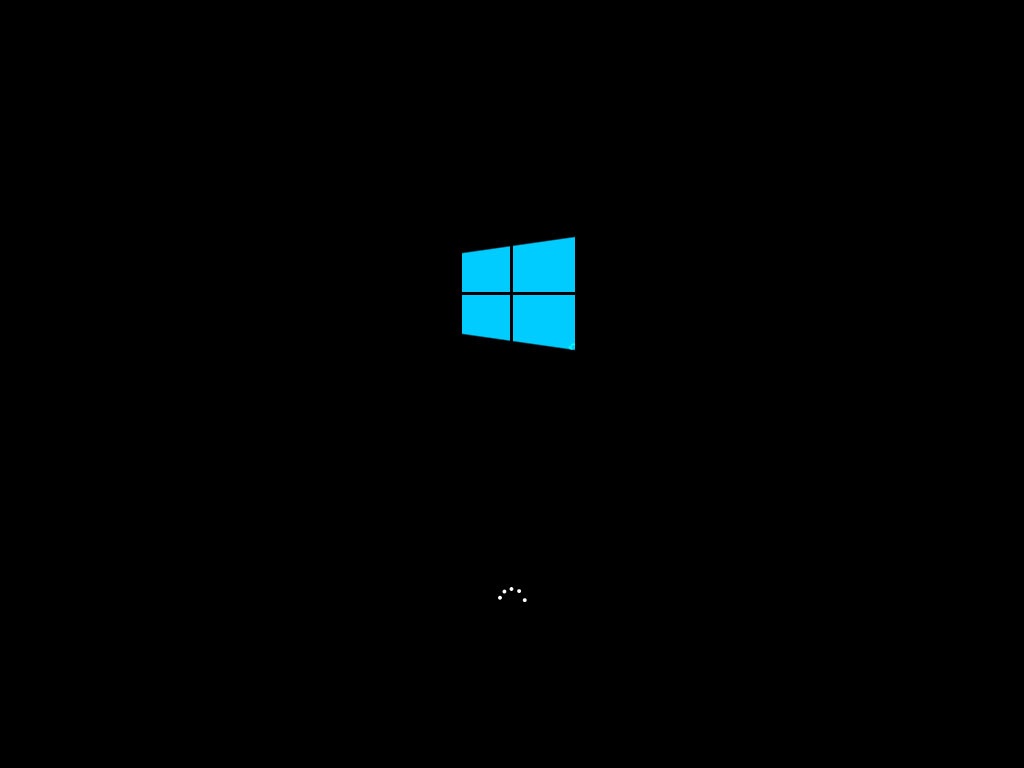
Step 1 - Place Windows 8 DVD in your dvd-rom drive and start your PC. Windows 8 will start to boot up and you will get the following screen with a rotating progress bar.


Step 2 - The next screen allows you to setup your language, time and currency format, keyboard or input method. Choose your required settings and click next to continue.


Step 3 - The next screen allows you to install or repair Windows 8. Since we are doing a clean install we will click on "install now".


Step 4 - The setup process starts as shown.


Step 5 - At this stage you need to type your product key that came with your copy of Windows 8. Click next once you have entered the product key correctly.


Step 6 - Read the license terms and tick I accept license terms. Then click next to continue.


Step 7 - Choose the type of installation you want. Since you are doing a clean install you need to click on custom.


Step 8 - Choose where you would like to install Windows 8. If you have one hard drive you will get an option similar to the image below. You can click next to continue then go to step 12.
If you have more than one drive or partition then you need to select the appropriate drive and click next. At this stage you can go to step 12.
If you want to partition a large drive then do not click next. Go to step 9.


Step 9 - If you want to partition an existing drive then click new. Choose the size of the partition and click apply.


Step 10 - Click OK to create the partition. Windows will create additional system partition which you don't have to worry about.


Step 11 - You will notice that you have 3 partitions. Partition 1 is system reserved. Leave this partition alone. Partition 2 is 30GB primary partition that was created in the last step. The third partition is unallocated which means it is not being used. You can however format it and use it as a second storage drive. This can be done after windows installation is finished so I will leave it for now.
Choose partition 2 (Primary Partition). This is where I will install Windows 8. Click next to continue.


Step 12 - At this stage Windows starts to copy files to your hard drive and begins theinstallation. This process might take a few minutes depending on your computer specification. Now is a good time to grab yourself a coffee.


Step 13 - When all the necessary files are copied Windows 8 will automatically restart as shown.


Step 14 - You will go through various progress bar and information messages as shown on the following images. Windows might restart automatically second time.


Step 15 - You are now presented with "Let's go through a few basics" screen. It will automatically select personalize option.


Step 16 - Choose your PC name and personalize the color.


Step 17 - Here you can choose express settings or choose customize. I will choose customize to make further customization.


Step 18 - Choose Yes, turn on sharing and connect to devices.


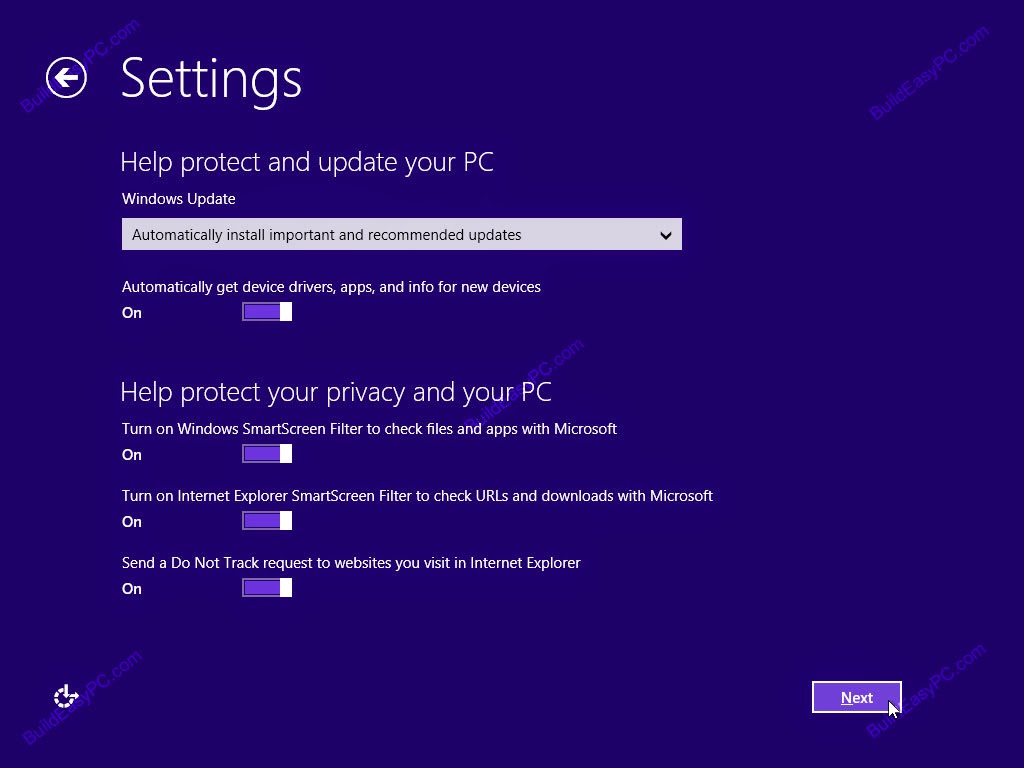
Step 19 - Help protect and update your PC. Choose your preferred option and click next.


Step 20 - Send Microsoft info to help make Windows and apps better. Choose your preferred options or leave the default settings. Click next to continue.


Step 21 - Check online for solutions to problem. Choose your preferred options or leave the default settings. Click next to continue.


Step 22 - Sign in to your PC. Here you can login to your PC using a Microsoft email account such as your hotmail account.
If you do not have a Microsoft account you can create one by clicking Sign up for a new email address. Go to Step 23.
If you don't want to create an email account and prefer to create a local user name, click Sign in without a Microsoft account. Go to step 24.


Step 23 - Sign up for a new email address. If you want to create a new email account you need to complete the form below.


Step 24 - Click local account


Step 25 - Here you can choose a local user name and password. Choose finish to continue.


Step 26 - At this stage Windows starts to finalize your settings. You will get the following information screen as the installation moves forward.


Step 27 - As Windows 8 setupprogresses you are given a presentation of the new interface. Its shows you how swiping the edge ofthe screen brings up the Charm bar. Using the Charm bar you can do a search or change your settings. It also demonstrates how you can hover your mouse on the bottom or top left corner to access the switchlist. This list shows all open applications and allows you to switch between them.


Step 28 - Soon as the demonstration finishes windows moves into the final stages of the setup.


Step 29 - Finally the setup process is finished and you are presented with a completely new and unfamiliar Metro user interface. You have your most common application right in front of you. Clicking on any tiles will launch that application. At this point you can start using your computer. However, it may not be fully configured. You need to make sure that all the hardware is detected correctly and the necessary device drivers are installed. This can be done from the device manager.


Step 30 - To go to device manager click search on charm bar on the right. Then type devmgmt.msc. Click on the devmgmt icon on the left.


Step 31 - You will see all your hardware listed as shown on the image below. You need to check if you have any yellow exclamation marks next to the name of the devices, similar to "Base System Device" on the image below. This indicates that the driver has not been installed for this device.
At this stage you can install the driver for this device. To do so, Right Mouse click on Base System Device -> Update Driver Software...


Step 32 - You can choose to "Search automatically for updated driver software" or "Browse my computer for driver software". If you have the driver CD or if the driver is on aUSB drive then choose "browse my computer for driver software". Window 8 will search and install the driver from the CD or you can locate the driver manually.
Once you have removed all the yellow exclamation marks from the device manager your Windows 8 configuration would be fully complete.


Blogger Widgets
 
Support : Creating Website | Johny Template | Mas Template
Copyright © 2011. How To Do Anything - All Rights Reserved
Template Created by Creating Website Published by Mas Template
Proudly powered by Blogger